
How to Choose a Discharge Hose Coupler?

Choosing a Discharge Hose Coupler is more than matching two ends. The wrong connection can leak, restrict flow, or separate under pressure. Picture a pump outlet vibrating beside a wet concrete floor. A loose clamp or incompatible seal can quickly become an operational problem. Small details matter.

The U.S. Department of Energy’s Improving Pumping System Performance sourcebook reports that pumping systems use nearly 20% of global electricity demand, and can account for 25–50% of energy use in some industrial facilities. A coupler does not determine a system’s energy use by itself. Still, its bore, pressure rating, and connection method can affect flow and reliability. The Hydraulic Institute’s pump-system guidance likewise emphasizes matching equipment to the system’s required flow and head. These references make one point clear: choosing by appearance alone is not enough.

NAHAD’s Hose Safety Institute guidance treats the hose, coupling, attachment method, and operating conditions as an assembly. That is useful when comparing cam-and-groove, threaded, flanged, or quick-connect designs. Check the conveyed fluid, temperature, working pressure, hose size, and expected movement. Verify seal material and installation requirements, too. Standards such as ISO 1402 address hose and assembly testing, while ISO 7241 covers specific hydraulic quick couplings; neither automatically suits every discharge service. A tidy catalog description can be reassuring, but it may leave out the detail that matters most. The right choice begins with the actual job, not the label.
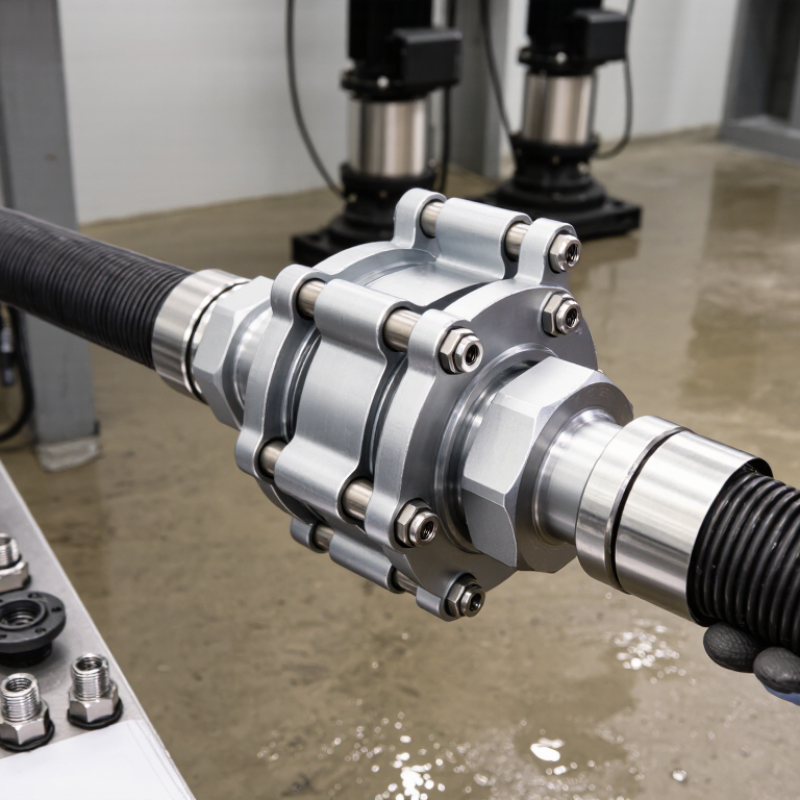
How to Choose a Discharge Hose Coupler?

Understanding the Role of a Discharge Hose Coupler

A discharge hose coupler connects the hose to a pump, pipe, or outlet, creating a path for moving liquid. It also helps keep the connection secure under pressure. A poor fit can cause leaks, reduce flow, or let the hose pull free. Small details matter. Match the coupler’s size and connection type to both the hose and the equipment. Check the inside diameter, thread or locking style, and the manufacturer’s pressure rating. The rating should suit the system’s working pressure, including possible pressure surges. A snug-looking connection is not proof of compatibility.

Material choice depends on the liquid, temperature, and work setting. A coupler used with water may not suit a fluid that can damage its metal or seals. Inspect the gasket for cracks, flattening, or grit, and make sure the locking parts engage fully. Before operation, check for movement or seepage at the joint. There is no single coupler that fits every discharge line, and measurements can be confusing when equipment uses different connection standards. When details are uncertain, confirm them with the equipment documentation or a qualified supplier rather than forcing the parts together.

Identifying Hose, Fluid, and Operating Requirements

A discharge hose coupler should match the hose before it matches the pump outlet. Check the hose’s inside diameter, wall construction, and end style. A mismatch can restrict flow or let the hose pull loose under pressure. Measure the hose opening rather than relying on an old label. Labels fade. Also note whether the hose is flexible, reinforced, or fitted with a rigid end.

The fluid matters just as much. Water, oils, and cleaning solutions can affect coupler materials differently, so check chemical compatibility and the fluid’s temperature. If the fluid carries grit or small solids, consider the passage size and whether the connection creates a narrow ledge where debris can collect. Keep it simple. Then confirm the coupler’s pressure rating against the system’s working pressure, including possible surges during startup or valve changes. A rating that only matches normal operation may not leave enough margin. In practice, it is easy to focus on diameter and overlook heat or pressure spikes. I would, too, if rushed. Before ordering, compare the coupler specification with the hose and equipment documentation, and verify the connection type in hand. One careful measurement can prevent a frustrating return.

Choosing a Discharge Hose Coupler

Match the coupler to the hose’s actual inside diameter and connection type. The chart shows inch-to-millimeter conversions for common nominal hose sizes; nominal size may differ from the measured bore. Also confirm fluid compatibility, temperature limits, and the coupler’s working-pressure rating against the system requirements.

Comparing Coupler Types, Materials, and Pressure Ratings

Choosing a discharge hose coupler starts with matching the connection to the job, not just the hose diameter. Cam-and-groove couplers connect quickly during frequent setup changes, while threaded couplers stay secure when properly tightened. Quick-connect designs save time, but their seals and locking features need regular inspection. Fit matters.

Material choice depends on the liquid, temperature, and working environment. Aluminum is lightweight for many water-transfer tasks; stainless steel offers better corrosion resistance in many settings, while brass suits some less aggressive services. These are broad tendencies, not guarantees. Check compatibility data for the exact fluid and seal material, especially with oils, cleaners, or temperature changes. Still, charts may not reflect every field condition. A coupler that looks sound may have a worn gasket.

Pressure ratings deserve equal attention. Compare the coupler’s working-pressure rating with the hose, pump, valves, and fittings; the lowest-rated part limits the system. Allow for surges during pump starts or valve closure, and never use burst pressure as an operating target. Do not guess. Verify specifications in reliable technical documents, then inspect threads, clamps, and seals before use. A correctly sized coupler can still be the weak point if its pressure rating is assumed rather than checked.

Checking Compatibility with Pumps and Discharge Hoses

How to Choose a Discharge Hose Coupler?

Checking Compatibility with Pumps and Discharge Hoses

A coupler must match both the pump outlet and the hose, not just one side. Check the pump connection type, such as threaded, cam-style, or flanged, and confirm its exact size. Then match the coupler’s hose tail to the hose’s inside diameter. A “two-inch” label can hide differences in actual fittings. Measure the outlet and hose opening with a ruler or caliper. Do not guess.

Pressure ratings matter. The coupler should handle the pump’s working pressure, including likely start-up surges. Also check fluid compatibility, temperature range, and seal material; a seal that swells or hardens can leak. Keep the passage as wide as practical, since a narrow fitting can restrict flow. I once treated matching size labels as enough. That was a poor assumption. Before full operation, secure the hose with the specified clamp or fastening method, then test the connection at low pressure and inspect for seepage. A dry exterior is reassuring, but it does not prove every seal is correctly seated. If the pump manual and fitting markings disagree, pause and verify the actual specifications.

Selecting and Installing the Right Coupler

How to Choose a Discharge Hose Coupler?

Selecting and Installing the Right Coupler

Choose a coupler that matches the hose’s inside diameter, construction, and rated working pressure. Check the fluid and temperature range, too; a fitting suitable for water may not suit another liquid. A proper fit matters. The hose should seat fully without being forced or left loose.

Confirm the connection style at both ends, such as threaded, cam-style, or flanged, and make sure it matches the pump or receiving line. Inspect the hose end for cuts, flattening, or exposed reinforcement before fitting anything. A small mismatch can look secure while still leaking under pressure. That detail is easy to overlook.

Before installation, isolate and drain the line. Clean the hose end and coupler, then insert the fitting to the specified depth. Use only the retention method approved for that hose and coupler, such as the correct clamp or crimp; extra tightening is not a reliable fix. After assembly, check for movement and leaks during a controlled, low-pressure test. If the joint shifts, stop and inspect the fit rather than simply tightening it again. The manufacturer’s installation instructions should guide the final checks, since coupler designs differ.

Article Source:

Select Electrical Logo
Since 1988

Select Electrical Ltd. © Copyright 1988-2025